Browsing Category

ColdApp

Appetizers/ ColdApp/ Sandwiches

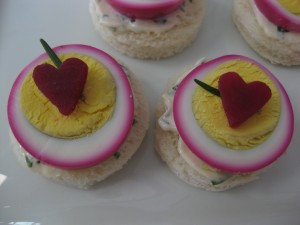
Pink Heart Egg Finger Sandwich

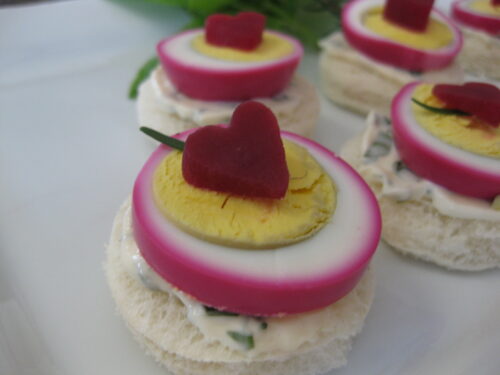
I “heart” you finger sandwiches. Pretty and pink.

I have done these little sandwiches for bridal showers, baby showers and just because the are so cute. If you have an upcoming shower of any type, these are the perfect little sandwiches.

I love beets – period. On the other hand my husband says he doesn’t like “red” things on his plate and won’t try them.  He does eat ketchup, tomatoes, and other red things.  I think this is his way of saying “I don’t like beets”. I love the little heart cutouts for this sandwich and people are always thinking I hand carve them.

You’ll notice that only the outside is pink. The pinkness depends on how long you let them soak in the beet juice. These only soaked for about 3 hours. If you soak them overnight they will dye pink all the way to the yolk. Sometimes it may start to dye the yolk too so I usually remove after 5-6 hours. You can experiment with 4-5 hours first and if that isn’t pink enough soak longer on the next try.
heart1

You can make your own pickled beets (less expensive) or you can buy them already pickled. You will need a lot of juice if you are dying a dozen or more eggs. I would probably do at least 2 times the recipe below. My hearts were cut with a tiny aspic cutter made by Ateco (aspic or jelly cutters) 3/4″.

Egg Sandwich with Beet Garnish

Ingredients

  • 1 can sliced beets
  • 1 cup beet juice
  • 1 cup vinegar
  • 4 Tbsp. sugar
  • 4 cloves
  • 1 tsp. salt
  • 12 hard boiled eggs peeled
  • White bread cut in 2″ circles

Topping for Bread:

  • Mayonnaise
  • Fresh basil chopped fine

Instructions

  1. Bring all ingredients to a boil (except the eggs and the beets). Let cool then add eggs and soak a minimum of 4 hours. If you want the whites to turn pink all the way through, let them stand about 7-8 hours. Save your beets for another recipe or you can add back to the juice after you are finished dying the eggs.
  2. Mix mayonnaise with fresh cut basil and top the bread circles with this mixture. Just before serving, slice the eggs carefully so you don’t lose any of the yolk. Top the bread slice with a slice of egg and then using a very small heart cutter, cut a slice of beet to go on top. You don’t want to put the beet heart on too soon or it will start to dye the yolk.



Appetizers/ ColdApp

Jalapeno Blue Cheese Spread

Ready for a margarita to go with this yummy spread.

Whether you are doing a south of the border meal or not, this appetizer is tasty, with a little crunch and spice.

One night at my sister’s house last week, in between tornado warnings,  barbecuing ribs, and entertaining two babies, we whipped up this yummy appetizer.

You want a beautiful glass to serve this in and any kind of cracker will do.

Jalapeno Blue Cheese Spread

Ingredients

  • 1 pkg. unflavored gelatin
  • 1/4 c. water
  • 3 oz. cream cheese
  • 5 oz. blue cheese crumbled
  • 16 oz. sour cream
  • 2 jalapeno peppers chopped fine
  • 2 Tbsp. vinegar
  • 2 oz. pimientos chopped
  • 1 c. pecans roasted
  • Assorted crackers

Instructions

  1. Combine gelatin with water in a custard up, let stand. Place cream cheese and blue cheese in a 2 quart bowl. Microwave at 50% power 60-90 seconds until softened. Mix with sour cream until smooth, set aside. Microwave gelatin on high 30 seconds or until boiling. Stir in vinegar and blend into cheese mixture. Add the peppers, pecans and pimentos. Pour into mold (or margarita glass) and chill several hours. Turn onto red leaf lettuce line tray (if you have molded it in a dish) and garnish with jalapeno flower or slices of jalapenos. Serve with crackers on the side.

Recipe Notes

(Hint: have all ingredients ready before starting. The gelatin may set too quickly if you start adding cold ingredients and you don’t have everything else ready to fold in.) Also, anytime I use a mold, I line it with plastic wrap then all you have to do is flip it out and peel off the plastic wrap. I usually do this recipe in either small margarita glasses or one of the giant ones. I have substituted pistachio nuts for the pecans and then sprinkled pistachios on top. Either way, it’s unbelievably good. —


Appetizers/ ColdApp/ Sauces

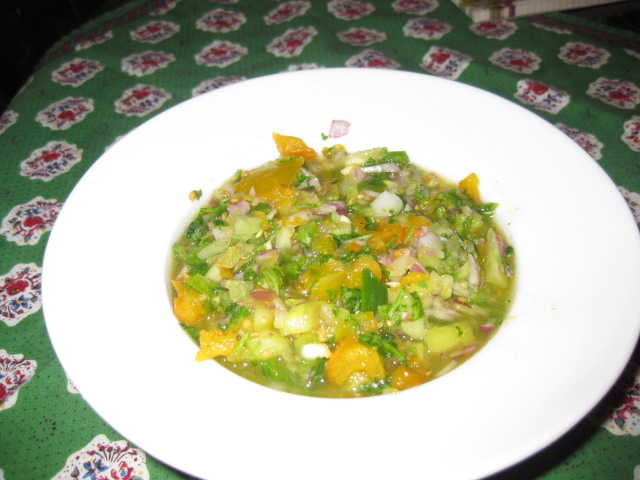
Green and Yellow Tomato Salsa

Good friends, good wine, good food, what more could you want…

We had the perfect dinner a couple of weeks ago.   A good friend came over while her husband was out of town in Colorado.    We swam, cooked, ate, drank a lot of wine and had a deliciously good time.  We love cooking together and trying out new recipes.  I don’t think we have ever cooked anything together that we didn’t think was fabulous.  When we do our day after Thanksgiving feast, we always come up with some great things to try.

This was the first time to use our new teak dining table and  my new hanging lanterns and it all made for a perfect evening.

Continue Reading…

Appetizers/ ColdApp

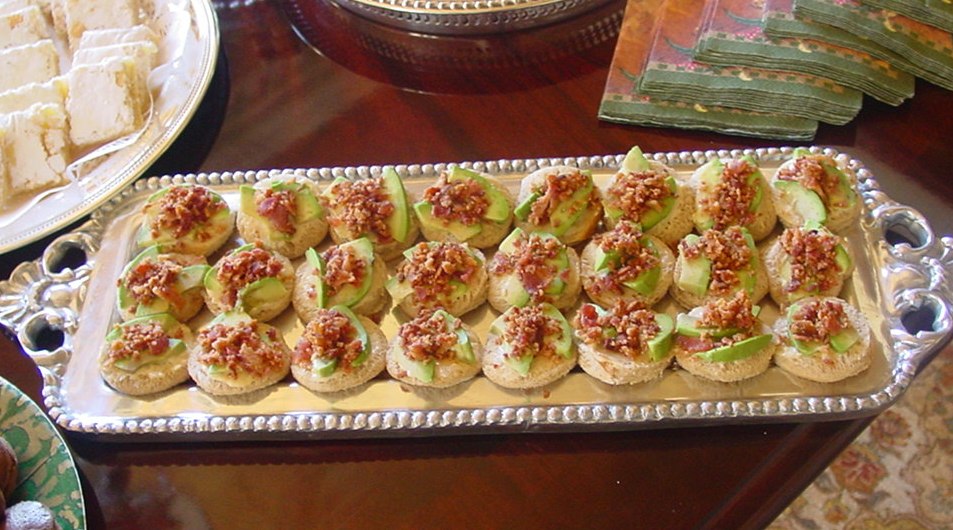
Avocado Bacon Canapes

Avocado and Bacon, Yum!

I have made these little canapes many times for parties and they are always a hit.  Even with the bacon they still have a great summery taste.  I have cheated before and used guacamole but the presentation isn’t as nice.  Hope you try these, I think the recipe is a “keeper”.  —  Sherry


Avocado and Bacon Canapes
Write a review
Print
Ingredients
  1. 8 slices of smoked bacon
  2. 1/4 c. lemon juice
  3. 1/4 c. water
  4. 1 avocado, peeled and sliced thin
  5. 1/2 c. Hellman’s mayonnaise
  6. 1 Tbsp. butter, softened
  7. 1/2 tsp. Worcestershire Sauce
  8. 1 dash of hot sauce
  9. 24 slices of bread, white or wheat
Instructions
  1. Mix the lemon juice and water and add the peeled and sliced avocado. Fry the bacon until crisp, chop and set aside. Mix the mayonnaise, butter, Worcestershire sauce and hot sauce. Trim the crust from the bread and cut into shapes. Spread with the mayonnaise mixture, fan out two to three thin slices of avocado on top of the mayonnaise mixture and sprinkle with bacon.
Rosemary and the Goat https://rosemaryandthegoat.com/
ColdApp/ Garnish

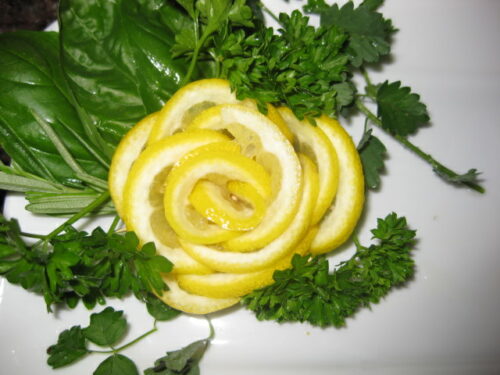
Citrus flower garnish

Don’t Play with your food…

I’m sure all of us have memories of our mothers saying “don’t play with your food”. I know my twin sister and I did when we were small — we got into everything. I told my own children not to play with their food. Seems like if they didn’t like something, they would move it all over the plate to make it look like they had eaten it. They were picky eaters, but have all grown into wonderful cooks, ready to try anything unusual.

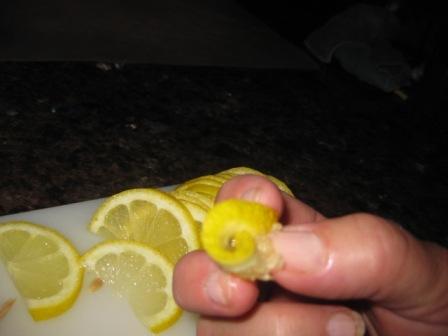
So, playing with food. When I was in a Hospitality Management program yearssssssssss ago I had a semester of Garde Manger. In this class we did plate painting, ice sculptures (my first and last, boy was that cold), we did sushi, all kinds of organ meats, cheeses, everything including my favorite, garnishes. I would go home and PLAY with anything I had in the refrigerator. I love making these citrus flowers. I have used lemons, limes, oranges, lemon and limes together. I use these as garnishes on seafood trays or dessert trays. Sure hope you will try these. I can make one in less than 10 minutes tops.

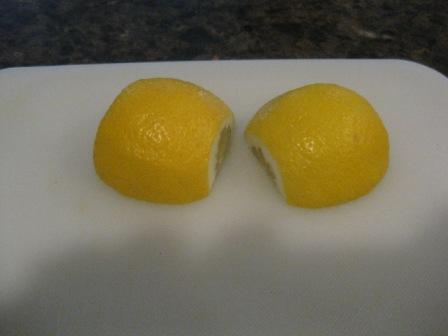
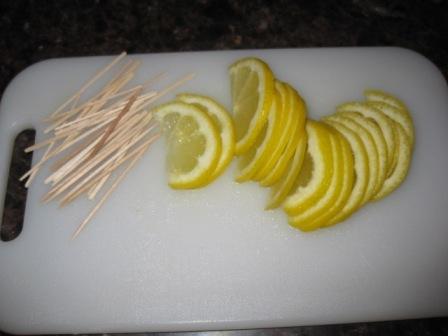
First you are going to take your lemon (lime, or orange). Using a very sharp knife and being very careful, cut the ends off, cut it in half (lengthwise) and proceed to cut in very thin slices. You want the slices thin because you are going to roll the slices up.


Keep the slices as thin as possible. You will be glad later.

Have your toothpicks ready, you will need quite a few.

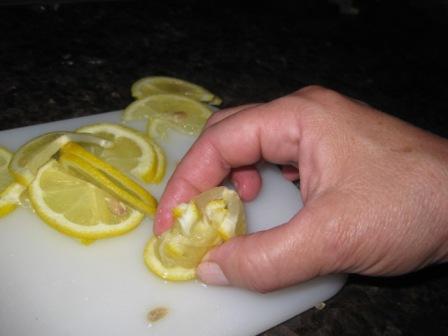
Pick out one of the thinner slices and roll it up. Then take another slices and overlap it. Keep doing this. You may find it hard to hold on to but after a few slices and wrapping…

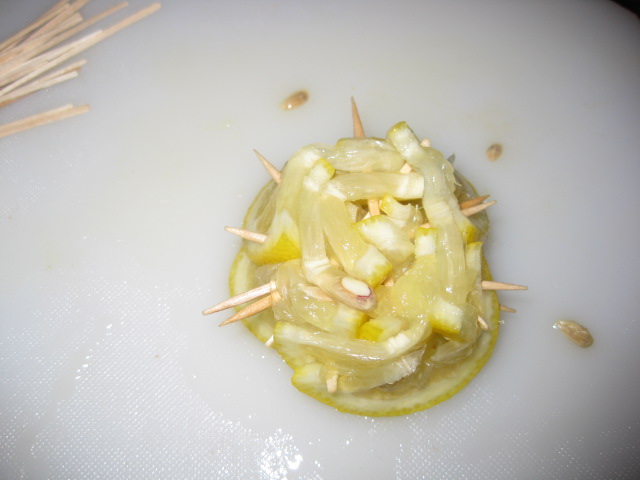
Turn it upside down and proceed to overlap slices, building your flower from the bottom up. When you have used all your slices or have the flower as big as you want…

Start inserting toothpicks in the flower. You can clip the ends but I usually cover up with herbs.
Turn over, and there you have it — a beautiful citrus flower. This one is garnished with basil, parsley, a sprig of rosemary and some salad burnett. Mint is really pretty also as a garnish. Hope you will try these. I have never tried a grapefruit but will one day. I will have to show you how to do a turnip rose. They are beautiful too. — Sherry
Appetizers/ ColdApp/ Sandwiches

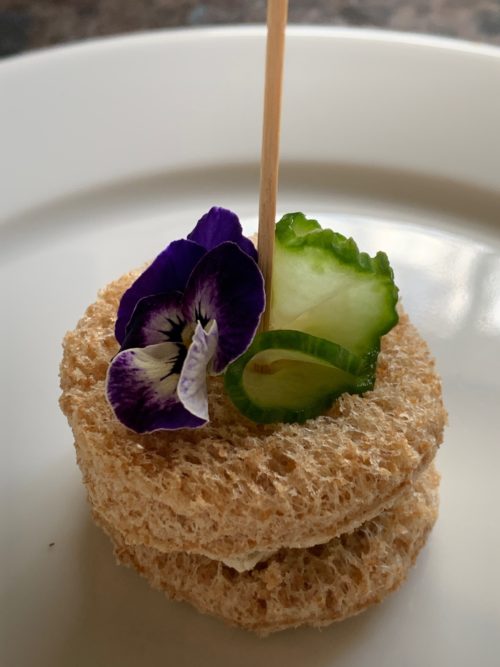
Cucumber Sandwiches

You’ll be cool as a cucumber when you try these cucumber sandwiches. The little center you see here are tiny dried rosebuds. I can’t find these anymore so I mix some softened cream cheese and mayonnaise and tint it yellow and pipe center into the flowers.

When I was pregnant the first time, we lived in Louisville, Kentucky. I craved this spread they called Benedictine Spread. It was a cucumber spread and you could buy it in cartons already prepared at the grocery. I would eat that for breakfast and lunch some days. Finally I found a recipe and started making it myself.

IMG_1510

I have all the ingredients ready to make the sandwiches, the cucumber spread, the cut-out bread and the sliced cucumbers.

IMG_1511IMG_1513

Spread a little cucumber spread on the bottom piece of bread, top with cucumber slice and then the other piece of bread. You can finish off with a little yellow mayo in the center.


Cucumber Sandwiches

Ingredients

  • 2 large cucumbers
  • 8 oz. cream cheese softened
  • Tabasco to taste
  • garlic salt and seasoned pepper to taste
  • 1/2 c. mayonnaise
  • 1 Tbsp. fresh lemon juice
  • 1/4 c. finely grated onion
  • white or wheat bread

Instructions

  1. Take one cucumber, peel, cut in half and scrape out seeds. Grate the cucumber and the onion into a piece of cheesecloth and squeeze out moisture.
  2. Put the cream cheese, mayo and seasoning into a mixing bowl with the grated cucumber and onion. Mix until well blended. I add a drop or two of green food coloring. Take the other cucumber, cut off each end and then drag a fork down the sides all the way around. I usually use my mandoline and cut these very thin. Now for the ones in the picture, I use a flower cutter for the bottom and a daisy cutter for the top.
  3. Cut out bread shapes (you can always just do them in rounds). Spread a little of he cucumber spread on one bread slice, top with a cucumber slice and then another bread slice. I sometimes make these one day ahead. If you are going to pipe in a center to the flower, wait and do that right before you serve them.
ColdApp/ Garnish

Cabbage Flower

 
Red cabbage flower
 
This picture isn’t so much about the recipe but about the cabbage flower I used to decorate a tray. I love making these for events I cater. Simple to make and really make an impact on a tray. Take a small red cabbage and using a very sharp knife, make 8 cuts going almost to the bottom but DO NOT cut all the way through the core. Take the head of cabbage and fill a 5 gallon bucket with water. Soak the cabbage in it overnight or until the cabbage has opened up like a flower. These look beautiful on vegetable display. I have cut out the center and inserted small bowl of dip in the middle. The appetizer that is on the tray is biscuit medallions with cilantro mayonnaise spread on top, topped with a grilled marinated pork tenderloin with mango salsa as a garnish.
-Sherry
Appetizers/ ColdApp

Rosemary and the Goat

(Hey, where’s Rosemary?)

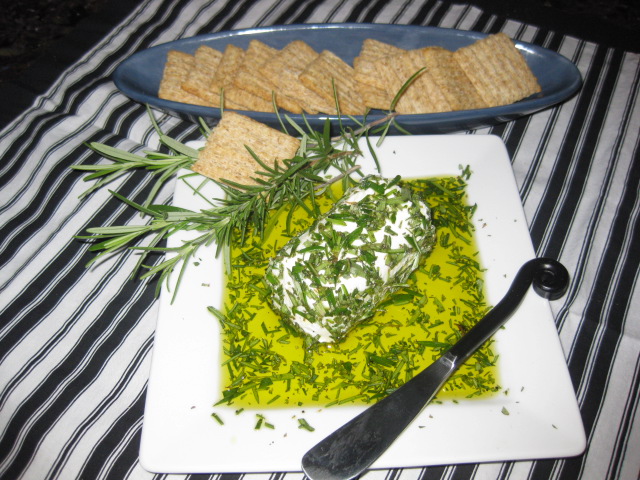
I guess it is time for me to post about Rosemary and the Goat. I have an appetizer recipe a friend gave me. It is so easy and delicious and I almost always have what I need on hand to make it.
 
This little appetizer is quick to make and everyone will love it. When I was trying to come up with a name for this blog, this was the first thing that popped into my head. I do need to get some better pictures of this dish though.
 
Hope you will try it soon.
 
blogdinner 007
 
Rosemary and the Goat
Write a review
Print
Ingredients
  1. 1 small roll goat cheese
  2. about 1/2 cup rosemary, coarsely chopped
  3. 1/2 c. good quality olive oil
  4. fresh baguette slices or crackers
Instructions
  1. Take about 1/4 cup rosemary and add to the olive oil and let sit for about 30 minutes to infused the flavor of the rosemary.
  2. Remove the goat cheese from package and roll the entire log in the remaining chopped rosemary.
  3. When ready to serve, put the rosemary coated goat cheese on a platter and pour all the olive oil over the cheese.
  4. Serve with toasted or plain baguette slices or crackers.
Notes
  1. If I used a cracker it would be something like Triskets. The bread slices are the best.
Rosemary and the Goat https://rosemaryandthegoat.com/